Before diving deep into the heart of Dutch butter cake’s recipe and its compelling narrative, let’s talk about what pairs beautifully with this delightful dessert. Imagine this: a warm slice of cake, buttery and luxurious, alongside a refreshing cup of coffee. Now that’s a match made in culinary heaven!
You can also serve the cake with a dollop of cream to cut through the richness or a scoop of vanilla ice cream to contrast the cake's dense texture. Fresh fruits, like strawberries or blueberries, add a vibrant burst of flavor that complements the buttery notes.
Dutch butter cake, or "boterkoek", is not just a recipe; it's a tradition, a treat passed down through generations. Growing up, I remember my grandmother whipping up this cake for festive family gatherings.
The aroma of sugary butter filled her kitchen, drawing us in like moths to a flame. Each bite is a reminder of home. But what is it that makes this cake special? Why should you roll up your sleeves and try making it yourself?
We’re about to explore this delicious treat, its ingredients, how it tastes, its uniqueness, and even storage tips. Trust me; by the end of this piece, you’ll be ready to bake this cake!
Why This Recipe Works?
Every successful recipe has a structure that makes it sing. Dutch butter cake is no exception. Here are a few key reasons this recipe is destined for your recipe book:
1. Simplicity of Ingredients: Sometimes, less is more. This cake doesn’t require dozens of ingredients. With only a handful—mostly kitchen staples—you’ll create a dessert that impresses. This makes it perfect for beginners and busy bakers alike.
2. Perfect Texture: This cake strikes that elusive balance between crumbly and chewy. The technique and ratios used here ensure you get that perfect texture. Once you sink your teeth into a piece, you’ll understand what I mean.
3. Quick Preparation: Who doesn’t appreciate a recipe that doesn’t eat up your entire day? This cake is quick to prepare given that it uses straightforward methods. You’ll be enjoying a slice in no time.
4. Versatile Serving Options: Dutch butter cake plays well with others! This dessert lends itself beautifully to being served with various sides, turning it into a flexible addition to any gathering.
How Does It Taste?
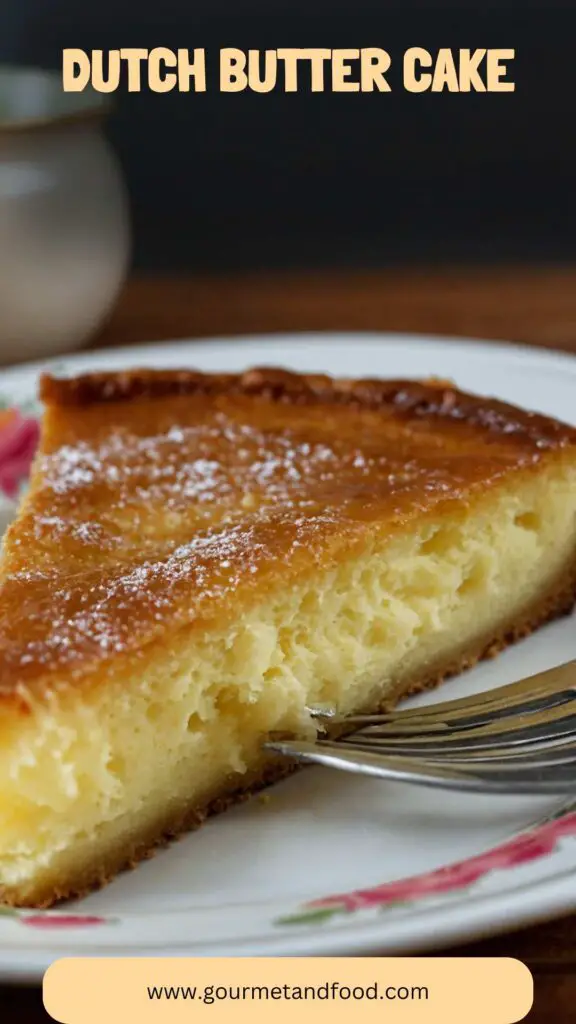
Let's talk taste. Imagine biting into a thick, buttery slice. The first impression is rich; the sweetness envelops your palate without overwhelming it. There’s a gentle hint of vanilla and a warm comfort that lingers.
As you chew, the cake reveals its tender crumb, making each bite melt in your mouth. It’s not just a straightforward sweetness; this cake reflects nuances that evoke nostalgia.
What Sets This Recipe Apart from Other Dutch Butter Cake Variations?
Compared to typical variations that might veer into overly sweet territory or add unnecessary ingredients, this recipe maintains authenticity. It's the classic preparation I remember from my childhood, but honed to perfection.
This version uses a touch of cardamom, giving it an aromatic twist that sets it apart while staying true to its roots. Many recipes add things like nuts or chocolate, but this keeps it straightforward and accessible, focusing on what true butter cake should be—a buttery, rich treat.
The Ingredients
Here’s what you need to whip up Dutch butter cake:
1 cup (250 grams) unsalted butter, softened: The star of the show.
1 cup (250 grams) superfine or caster sugar: This helps achieve that tender crumb.
1 tablespoon vanilla sugar or 1 teaspoon pure vanilla extract: For that warm flavor boost.
2 cups (250 grams) all-purpose flour, sifted: A sturdy base for our cake.
1 large egg: Essential for binding everything together.
1 tablespoon cornstarch: This adds tenderness and structure.
½ teaspoon ground cardamom: A unique touch.
A pinch of sea salt: Balances sweetness.
Instructions
Here’s a step-by-step guide to baking your Dutch butter cake.
Step 1: Preheat the Oven
Start by preheating your oven to 350°F (175°C). This ensures that your cake bakes evenly.
Step 2: Prepare Your Baking Pan
Grease an 8-inch round cake pan with butter. Line the bottom with parchment paper for easier removal later.
Step 3: Beat the Butter and Sugar
In a large mixing bowl, cream together the softened butter and superfine sugar. Use a hand mixer or stand mixer on medium speed. Beat until the mixture is light and fluffy; about 3-5 minutes. You’re aiming for a pale yellow blend that feels airy and delightful.
Step 4: Add the Egg and Flavorings
Crack the large egg into the butter-sugar mix. Add the vanilla extract (or vanilla sugar) and beat again until combined. This should take about 1 minute.
Step 5: Combine Dry Ingredients
In a separate bowl, whisk together the sifted flour, cornstarch, ground cardamom, and sea salt. Mixing the dry ingredients ensures an even flavor distribution in your cake.
Step 6: Mix Wet and Dry
Gradually add the dry mixture to the wet blend. Stir gently with a spatula or a wooden spoon until just combined. Avoid overmixing; a few lumps are okay.
Step 7: Pour into the Pan
Transfer the batter into your prepared cake pan. Use a spatula to smooth the top if needed.
Step 8: Bake
Place the pan in the preheated oven and bake for about 30-35 minutes. You can check for doneness by inserting a toothpick in the center—the toothpick should come out clean.
Step 9: Cool and Serve
Once done, remove the cake from the oven and let it cool in the pan for about 10 minutes. Transfer to a wire rack to cool completely before serving.
Notes
Here are some handy tips to make your baking experience even better:
Use Room-Temperature Butter: Softened butter mixes better, ensuring a fluffier cake.
Sift Dry Ingredients: Sifting avoids lumps and helps with lightness.
Chill the Cake: After baking, a brief chill in the fridge can help firm up the texture.
Don’t Overmix: Overmixing leads to a denser, less pleasant texture.
Experiment with Flavors: Trying different spices or oils can give each cake a unique twist!
Nutrition Information
Here’s an approximate breakdown per slice (assuming 12 slices):
Calories: 210
Total Fat: 13g
Saturated Fat: 8g
Cholesterol: 40mg
Sodium: 50mg
Total Carbohydrates: 20g
Sugars: 10g
Protein: 2g
Note: Nutritional values may vary based on specific ingredients and methods used.
How Do You Store This Dutch Butter Cake?
To keep your Dutch butter cake fresh:
Room Temperature: Store at room temperature for up to 3 days in an airtight container, separated by parchment paper if you stack slices.
Refrigerate: If you need it for a longer period, it can be kept in the fridge for about a week. Just make sure it’s well-wrapped.
Freeze: For longer storage, wrap slices tightly in plastic wrap and foil, placing them in a freezer bag. It’ll last for about 2-3 months.
When ready to enjoy, take it out, thaw at room temperature, and maybe pop it in the oven for a few minutes!
Sides for Dutch Butter Cake
Dutch butter cake shines brightest when accompanied by a good side. Here are three delightful suggestions:
1. Whipped Cream: A cloud of freshly whipped cream adds a light, airy touch. Sweetened slightly, it balances the richness of the cake beautifully.
2. Fresh Berries: Strawberries, blueberries, or raspberries offer not just a pop of color, but their tartness complements the sweetness of the cake. You might even consider a berry compote for added flavor.
3. Ice Cream: A scoop of high-quality vanilla or even a scoop of salted caramel ice cream provides that familiar comforting experience, especially on warm days.
What Alternatives Can You Use for the Ingredients If They Are Not Present in Your Kitchen?
We’ve all been there—about to bake, only to realize we’re missing something. Here are alternatives:
1. Butter: If you're out of unsalted butter, you can use margarine or coconut oil. Just remember that margarine could change the flavor slightly.
2. Superfine Sugar: Granulated sugar can act as a substitute. Just give it a quick blitz in a food processor if you want a finer texture.
3. All-Purpose Flour: If you don’t have all-purpose flour, you could use cake flour. This will result in a lighter texture, though you may need a bit more.
4. Vanilla Extract: In a pinch, you can use almond extract or lemon zest for a different yet exciting flavor profile. Just be cautious with almond—it's potent!
Conclusion
Dutch butter cake is more than just a delicious dessert; it’s a slice of my childhood. The flavors, the textures, the memories—each element plays a crucial role in creating something truly special.
You now have all the tools to make this cake an enduring part of your kitchen repertoire. With its straightforward ingredients and preparation, I encourage you to bake it soon. Pair it with your favorite sides, and relish every bite. Happy baking!
Dutch butter cake, or "boterkoek", is not just a recipe; it's a tradition, a treat passed down through generations. Growing up, I remember my grandmother whipping up this cake for festive family gatherings.
The aroma of sugary butter filled her kitchen, drawing us in like moths to a flame. Each bite is a reminder of home. But what is it that makes this cake special? Why should you roll up your sleeves and try making it yourself?
Ingredients
1cup(250 grams)
1cup(250 grams)
1tablespoon vanilla sugar or 1 teaspoon pure vanilla extract: For that warm flavor boost.
2cups(250 grams)
1large egg: Essential for binding everything together.
1tablespoon cornstarch: This adds tenderness and structure.
½teaspoon ground cardamom: A unique touch.
A pinch of sea salt: Balances sweetness.
Instructions
1
Here’s a step-by-step guide to baking your Dutch butter cake.
Step 1: Preheat the Oven
2
Start by preheating your oven to 350°F (175°C). This ensures that your cake bakes evenly.
Step 2: Prepare Your Baking Pan
3
Grease an 8-inch round cake pan with butter. Line the bottom with parchment paper for easier removal later.
Step 3: Beat the Butter and Sugar
4
In a large mixing bowl, cream together the softened butter and superfine sugar. Use a hand mixer or stand mixer on medium speed. Beat until the mixture is light and fluffy; about 3-5 minutes. You’re aiming for a pale yellow blend that feels airy and delightful.
Step 4: Add the Egg and Flavorings
5
Crack the large egg into the butter-sugar mix. Add the vanilla extract (or vanilla sugar) and beat again until combined. This should take about 1 minute.
Step 5: Combine Dry Ingredients
6
In a separate bowl, whisk together the sifted flour, cornstarch, ground cardamom, and sea salt. Mixing the dry ingredients ensures an even flavor distribution in your cake.
Step 6: Mix Wet and Dry
7
Gradually add the dry mixture to the wet blend. Stir gently with a spatula or a wooden spoon until just combined. Avoid overmixing; a few lumps are okay.
Step 7: Pour into the Pan
8
Transfer the batter into your prepared cake pan. Use a spatula to smooth the top if needed.
Step 8: Bake
9
Place the pan in the preheated oven and bake for about 30-35 minutes. You can check for doneness by inserting a toothpick in the center—the toothpick should come out clean.
Step 9: Cool and Serve
10
Once done, remove the cake from the oven and let it cool in the pan for about 10 minutes. Transfer to a wire rack to cool completely before serving.
Nutrition Facts
Servings 16
Amount Per Serving
% Daily Value *
Total Fat13g20%
Saturated Fat8g40%
Cholesterol40mg14%
Sodium50mg3%
Total Carbohydrate20g7%
Sugars10g
Protein2g4%
* Percent Daily Values are based on a 2,000 calorie diet. Your daily value may be higher or lower depending on your calorie needs.
Note
Here are some handy tips to make your baking experience even better:
Use Room-Temperature Butter: Softened butter mixes better, ensuring a fluffier cake.
Sift Dry Ingredients: Sifting avoids lumps and helps with lightness.
Chill the Cake: After baking, a brief chill in the fridge can help firm up the texture.
Don’t Overmix: Overmixing leads to a denser, less pleasant texture.
Experiment with Flavors: Trying different spices or oils can give each cake a
Keywords:
Dutch Butter Cake
Maria George
Registered Dietitian & Cookbook Author
Maria George is a cookbook author and registered dietitian, passionate about merging gourmet cuisine with nutrition through her blog Gourmet And Food. Based in Illinois, she draws on her rich culinary background to create elegant, approachable recipes that celebrate quality ingredients and creativity in the kitchen. Maria’s goal is to inspire food lovers of all levels to explore gourmet cooking and enjoy the art of dining.